Monday, January 26, 2015

and it goes up to 12 - desktop volume control

making use of this vintage HP instrument knob since it did not fit what I needed it for - and I always wanted a nice big desktop volume control

https://plus.google.com/u/0/+VladimirPantelic/posts/G5TSXgERhf3


Magic Trackball

I brought my Marconi RB2 trackball from 1985 into the 21st century by converting it to USB. It also got a special lucky trackball.

I had it running as a serial device in the past using an old Genius mouse that was wired to the optical encoders. Sadly that never really worked reliably, I think the serial mouse could not provide enough power to also power the trackball electronics. The removed Genius mouse PCB can be seen on the left side.

Now I upgraded the electronics with an old Logitech PS/2 mouse that runs into an PS/2 to USB converter. Hookup was straightforward after removing the optical receivers in the mouse, I only had to switch the polarity and pullups of the mouse buttons. I had planned to put the USB converter also inside and only expose an USB cable, but the original brown cable is molded in and I did not want to do too much damage, so now it carries PS/2 and the converter is outside.

https://plus.google.com/u/0/+VladimirPantelic/posts/URrzMyAPch5


Sunday, January 25, 2015

LEGO sorting boxes

Plywood sides and MDF bottoms. Sorting boxes are various size Allit E45 sorting boxes in 45mm height


JANSJÖ, JANSJÖ sat on a wall


Thursday, January 22, 2015

SansAmp PSA 1.1 internals


Looks like they shrank it all to SMD and used Analog Device digital potentiometers instead of the Dallas parts


Wednesday, January 21, 2015

TECH 21 SansAmp PSA-1 PCB traces and schematics

Since nobody seems to have done this before and I was sick in bed for a week recently, I used that time to trace the schematics of the SansAmp PSA-1. One "tiny" part is missing and that's the "mystery" circuit inside the black box used for the CRUNCH and DRIVE. I assume it's based around yet another 072 dual opamp since there are +5V/-5V going into the black box. Anybody with an x-ray?

I did not trace the digital part as that's rather boring. In the end there are only 5 control lines that go to the analog part, two go to the 4053 analog multiplexer of which one switches the bypass signal and the other seems unused. The other three control the four 100k DS1267 dual digital potentiometers which are daisy chained together so that only three control signals are needed.

http://www.freestompboxes.org/viewtopic.php?f=7&p=247415#p247412


user DimebuGG at freestompboxes.org made a nice PDF from my crude sketches and added a "guess" for the gooped up section:


 http://www.freestompboxes.org/viewtopic.php?p=247791&sid=f9471fc5a58c04a4964a57049c687f59#p247791

Tuesday, January 20, 2015

what to do with US style wall warts

  1. solder 4mm "banana" plugs
  2. add shrink tube
  3. enjoy


Name that ware

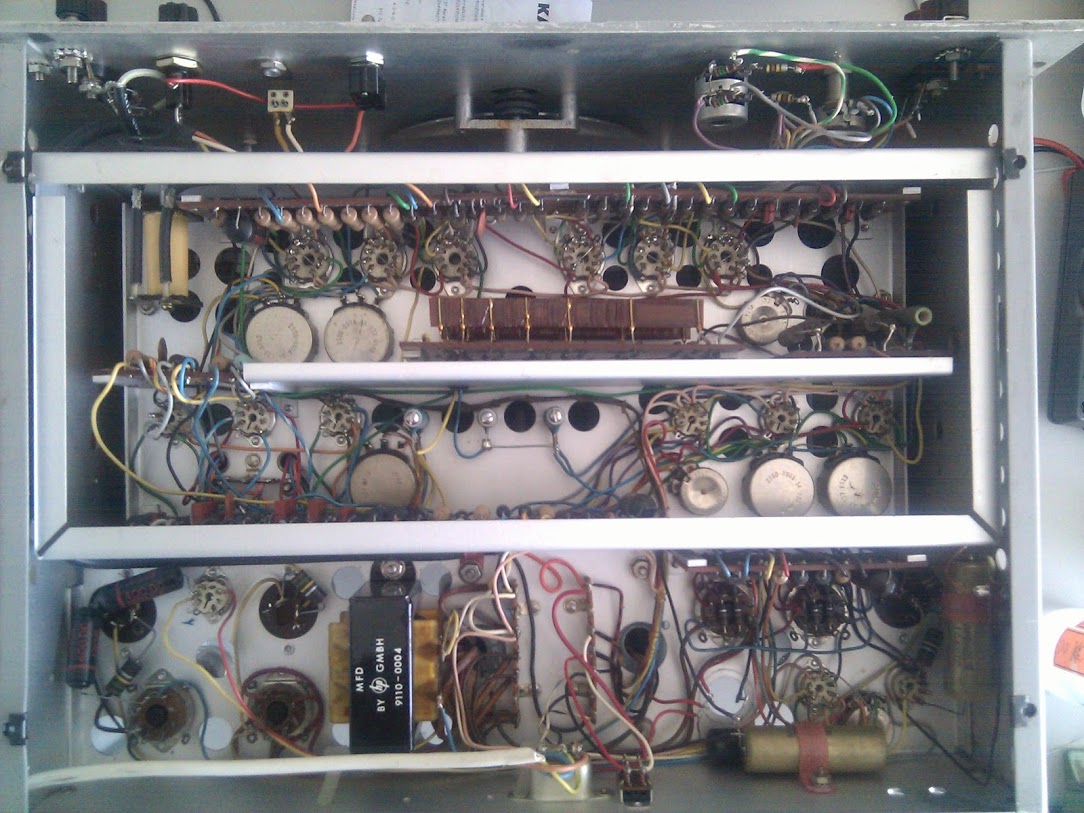
It is a HP 202A Low Frequency Function Generator, which was introduced in 1952, the model here is the slightly revamped one from 1959 onwards (I cannot find an exact production date on it, so I guesstimate it in the early 1960s). It can generate sine, triangular and square waves from 0.01Hz up to ~1200Hz and is still working properly after ~50 years. I guess the unit has been maintained and serviced over the years, so the tubes must be all quite newer than the unit itself.

The sine wave is "synthesized" from the triangular wave using a network of silicon diodes and resistors with about 1%rms distortion, more about that in the manual: http://www.hparchive.com/Manuals/HP-202A-Manual-SNprefix-037.pdf

A company where I interned as a student phased them out and they landed in a dumpster where I rescued one and another complete set of tubes from another one. It is missing it's top cover and enclosure, I guess it was sitting inside a 19" rack for most of its active time. Since then it has been sitting in my parents basements for another 20 years

https://plus.google.com/u/0/+VladimirPantelic/posts/BrArMh9wmeG


look Ma, I made a ... mess

buffer/5 band EQ/booster and headphone amp with aux line-in mix

https://plus.google.com/u/0/+VladimirPantelic/posts/DxDJwM945HT


the SMINT amp

because using Altoids tins is so 2012

https://plus.google.com/u/0/+VladimirPantelic/posts/TehojP9GEeJ


Monday, January 19, 2015

Drain Cam v2

Made from a 50mm water pipe bushing and two end caps. LEDs powered by 2 AA batteries and a Reed switch. One length of pipe was cut open lengthwise to form a sleeve around the bushing, inset is a small ball magnet that activates the Reed switch when the sleeve is rotated into the right position. Attached at the back is a spiral drain cleaner which allows to push the camera down the pipe and rotate it if needed.

I had to 3D print the battery holders as ordinary ones were too large and interfered with the camera body in the middle of the pipe.

I made the mistake of using polypropylene (PP) pipe which is almost impossible to glue, e.g. epoxy and superglue don't really stick to it, so it proved really hard to seal the thing. I ended up filling both end caps completely with silicon caulk just to be on the safe side.

https://plus.google.com/u/0/+VladimirPantelic/posts/bZk3xoJLs7A


just a simple A-B switch pedal

https://plus.google.com/u/0/+VladimirPantelic/posts/a3AaoJHW3Ek


making of a brass sustain block for a guitar tremolo unit

making of a brass sustain block for a guitar tremolo unit

https://plus.google.com/+VladimirPantelic/posts/DTnVhpJc3sr


Nexus 5 wireless charging stand

in which we make some leftover parquet flooring into a wireless charging stand

https://plus.google.com/+VladimirPantelic/posts/jXL5FgP3WnN